Getting started
CKSP brings modern language features to Kontakt scripting and compiles your code to standard KSP. CKSP Tools integrates the compiler into VS Code, together with completion, documentation, and Kontakt controls. If you are starting a new project, the extension provides the simplest way to set up your workspace.
Installation
With VS Code
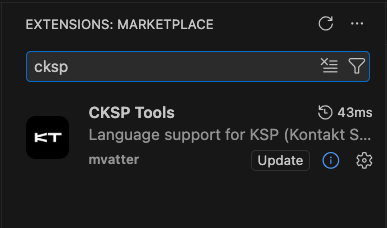 Install CKSP Tools from the Extensions view in VS Code, or open its Marketplace page.
The extension includes a release panel for downloading and selecting the CKSP compiler. Open an empty project folder in VS Code, then open the CKSP Sidebar to get started.
Requirements
The project initializer requires an installed copy of Kontakt 7 or newer. Select the Kontakt installation and compiler version you want to use when creating the project.
With another editor
CKSP is also available as a standalone compiler. See Installation for command-line usage and Sublime Text setup, or Language Server to integrate editor features. The following sections use the VS Code workflow.
Creating a project
In the CKSP Sidebar, choose New Project. You can also run CKSP: Initialize Kontakt Project from the Command Palette. Enter a project name and select the Kontakt and compiler versions.
The initializer creates the instrument, resource folders, and a main.cksp source file with a starter script. It also links the instrument to the generated resource script. The two files you will work with are:
Open main.cksp and keep its existing setup, including the #pragma output_path(...) directive. You can already compile this starter script; the next section adds a small interactive control to it.
For an existing project, see Project Settings to select the main file, resource container, and compiler.
Adding a control
A knob provides a simple way to see the edit–compile–test cycle in action. Add the following declaration inside the existing on init callback, before its closing end on:
This creates a control named feedback with values from 0 to 100. CKSP accepts KSP-style UI declarations without requiring a variable prefix.
Next, add a callback after the existing callbacks, at the top level of main.cksp:
Kontakt runs this callback whenever you change the knob. The current value is displayed in its status line, so you can test the script without loading samples or configuring MIDI input. The knob only displays a value; it does not change the instrument's sound.
Compiling your script
Click the play button next to Main File in the CKSP Sidebar. Alternatively, use the keyboard shortcut:
Shift+Cmd+R
Shift+Ctrl+R
CKSP Tools saves your files and runs the compiler in the cksp terminal. After a successful build, the generated KSP is written to Samples/Resources/scripts/main.txt, as configured by the source file's output directive.
Keep editing the source
Make changes in main.cksp. The generated main.txt is replaced each time you compile. See Output paths if you want to change where the compiler writes the result.
Trying it in Kontakt
The instrument the extension created for you should still be open und automatically reflect the changes you made to your script after you compiled. So you should see the Feedback knob appearing in the script's interface. Turn it and watch the value change in the "Kontakt Log" tab VS Code opened for you.
Change the label in set_text to Amount, then compile again. When Kontakt loads the updated resource script, the knob displays the new label. This is the same workflow you will use as your instrument grows: edit the source, compile, and test the result in Kontakt.
The control does not appear?
Check the cksp terminal for compilation errors, then confirm that Main File points to the source you edited and that the script slot loads the matching main.txt.
To test the output manually, copy the generated main.txt into an empty script slot and click Apply. With this method, repeat the copy-and-paste step after each build.
See Kontakt integration for the integrated workflow and Troubleshooting for more help.
Next steps
With the project set up, explore CKSP syntax to add variables, functions, and data structures. The editor guide covers completion, hover documentation, and navigation. If you are bringing an existing project from SublimeKSP, start with the supported features comparison.